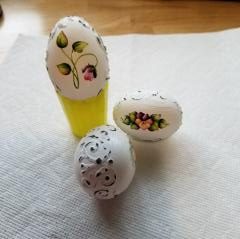
Vintage Easter Eggs
Yield: 2 Eggs
Equipment
- Fine grit sandpaper
- 1 Small flat paint brush
- 1 Soft cloth/rag
Materials
- 2 Washed, emptied, and dried eggs. Can always do more than 2 eggs.
- Stimulated liquid leading or Black fabric puff paint
- White acrylic craft paint
- Decals of choice
Instructions
- Blow out and rinse eggs. Let dry overnight.2 Washed, emptied, and dried eggs.
- Using Simulated Liquid Leading or Fabric Puff Paint, draw a decorative band around the egg, making sure to cover the holes on both ends. You can lightly trace a pattern with a pencil or free hand. Let dry overnight.Stimulated liquid leading
- Using the small flat paint brush, coat the entire egg in a layer of white acrylic craft paint. Let dry for 1hr.White acrylic craft paint
- With sandpaper laying on table, LIGHTLY sand only the decorative border to expose some areas and give it that antique look.
- Dust and rub egg with a soft cloth/rag.
- Center and place on your desired decal, or hand paint a picture of your liking.Decals of choice