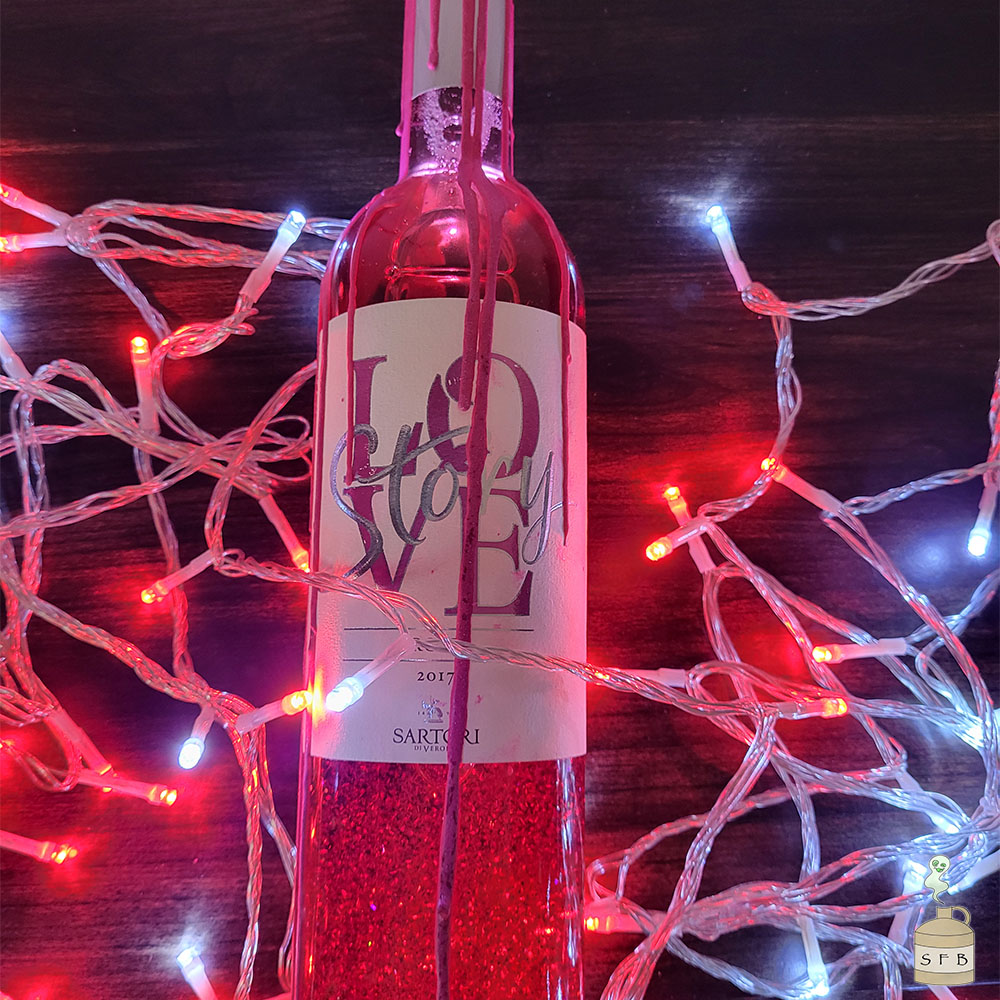
Valentines Glitter Jar
This Valentines Glitter Jar was an up-cycle idea from an old wine bottle that happen to be perfect for Valentines Day.
Also a great gift for teachers to have in the classroom or even to have around the house for some holiday sensory fun.
Valentines Day Glitter Jar
Equipment
- 1 Glue gun
- 1 Table covering
- 1 Funnel
- 1 Pair of Scissors
Materials
- 1-2 Sticks Pink or Red Colored Glue sticks Optional: can use old crayons
- 1 Empty Wine Bottle or Mason Jar
- Clear Glue
- Water
- Glitter
- 1 Circle Valentines Day themed or colored fabric
- Ribbon
Instructions
- Set up your area with table cloth or crafting mat. If you are using a table cloth I suggest using a plastic table cloth from your local dollar store. They make cleaning up so much easier and are cheap. You can also use trash bags or newspapers.
- If you are seeing that your glitter is more at a standstill and moving very slowly or not at all when you are turning the bottle up and down/shaking it. You will need to add more water. Don't forget to check your glitter when you are also looking at the liquid consistency. Add more glitter for more fun! *Please make sure you are remembering to put the cap on the bottle before turning it upside down/shaking it*
- Make sure you are testing the movement about 2-3 times before getting to the very top of the bottle as you do not want to have to end up dumping out the liquid to add more water or glue etc. Don't forget to keep checking that glitter!*Please make sure you are remembering to put the cap on the bottle before turning it upside down/shaking it*
- The ratio of glue to water is really up to you and the type of flow that you want but I found the Lava Lamp flow was a good consistency.
- Heat up the glue gun and pick the perfect Valentines Day color of glue you wish to seal off the top.
- If you do not have any colored glue sticks for a glue gun you can always used old crayons. This does require you to have to melt them,if you have a candle/wax warmer of some sort you can use that for an easy way to melt the crayon.
- Once you have your glue gun warmed and color picked out or your crayon is melted, you are now ready to seal off the top of the wine bottle.
Topping Options
- Glue/Crayon Option- This is for smaller bottles such as wine bottles etc. Pour the glue/crayon all over the cap along the sides etc. to create a seal. Make sure you have enough glue/crayon left to let it create a puddle and start to flow over the cap and onto the sides of the bottle for a drip effect.Once you are out of glue/crayon or satisfied with the dripping on the bottle etc. Set it aside to let the clue completely dry.
- Fabric Option- This is for the mason jars or smaller jars. (can also be used for smaller bottles such as wine bottles etc. as well. Using the ring/seal of the mason jar lid trace out your pattern on your fabric of choice and cut out. If you would like to have your fabric to have a fringe and hang over the seal and below the ring lid of the mason jar you can cut a square or circle to the size you would like for your lid. This is all determined by how much fabric you want hanging below the ring.Put just a dab of hot clue on the seal and place your fabric on top to hold it in place. Put the ring on top. Cut some ribbon to go around the ring for your final touch. You can tie off with a bow or you can make it an exact fit, putting a dab of glue at the ends to close it off.
- Display with your Valentines decorations, give as a gift to a teacher for their classroom, or just have in the house for some Holiday sensory fun
Notes
Check out some more great Valentines Day Stuff at our Valentines Day Hook Up!
This post contains affiliate links. As an Amazon Associate we earn from qualifying purchases at no additional cost to you. Find our full disclosure here.
We can’t thank you enough for your support in making our dreams come true and allowing us to share our adventures, recipes, and stories with you all!
Donations are a great way to support us for some server time so we can continue to provide you with content.
About The Author
Spirits Food and Booze
Spirits Food and Booze was created with love, and ideas from each one of us. We love to share our ideas, crafts, recipes, fun times, and experiences. We are amateur ghost hunters, foodies, crafters, and all around enjoy having a good time. We hope you enjoy our site and come back for more!
