Decorating Cake Pops
The basics on what you need to know about decorating cake pops. Of course, as you go along and the more experienced you become with your talent you will find different ways that may work better for you when it comes to decorating cake pops.
Here you will find the most basics and what worked best for me as I was starting out, and some of these steps I still use today when I am just doing some basic themes for a party or a fun dessert for a gathering.
Please feel free to share any ideas that you came across while decorating that may come in handy for others to try as well.
Lets get to decorating!
Prepping Work Area
- Make sure the area is spacious enough to spread out and work comfortably, you want to make sure you have enough room to move around freely as you will be doing a lot of it.
- Cleanse your area with either soap and water or Cleansing wipes. Let dry completely before setting up your work area.
- Have all your utensils available and ready for use.
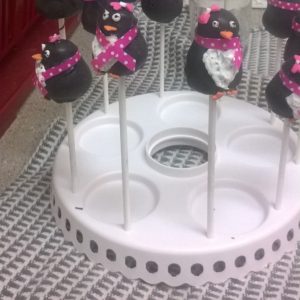
- Make sure to have your Cake Pop Stand ready. If possible have as many stands as you can so your cake pops can be spread out from each other so not to be touching while they are drying.
- I started out with styrofoam crafting blocks from my local craft store and wrapped them in foil. These are still great to use for any overflow when your cake pop stand is full.
Candy Melts 101
- Have all your Candy Melts picked out for each cake ball you are planning on decorating.
- It is usually best to make sure that you decorate “like” cake balls all at once that way it’s less re-heating of the candy melts.
- When melting candy you can use either a double boiler or individual microwave safe cups or bowls.
Microwave Melting
Using a microwave safe bowl or cup, melt candy on medium power in 30-second intervals, stirring in between. The first round of stirring the candy will still appear firm or some may still be whole. This is normal, continue heating every 30-seconds stirring in between until the candy is completely melted.
Keep in mind the more you stir, the candy continues to melt as the heat touches it while you are stirring. Make sure to pay attention as stir in between heating as you do not want to overheat the candy. It will begin to thicken and will become unusable.
A sign to watch out for overheating is the candy starting to dry out and stick to the side of the bowl. If this happens you will need to get a new bowl and start over as the candy is no good. You can always put this aside and reheat soft enough to use for drizzling etc. but will be no good for dipping.
Double Boiler Melting
I started out with a double boiler as that was how I was first taught to melt candy. When I started out with this hidden talent for decorating cake pops, I was only doing small batches for our daughters classroom parties in elementary school. When I got more involved in doing cake pops for baby showers and birthday parties etc. I used other methods that were more convenient for that situation.
Using a double boiler is more for batches that are all one color and is a one and done, so that way you are not having to wash your pan after each use.
Fill the bottom portion of the double boiler with water and bring to rolling boil. While water is boiling add your Candy Melts to top portion of your double boiler and set aside. Once your water has come to a boil remove from heat, place top pan with candy melts over bottom pan of water and start stirring continuously until completely melted and smooth.
Warming Tray
This method is great for melting multiple colors. If you are using a warming tray make sure to use small oven safe bowls that are deep enough for dipping. Make sure the warming tray is set to low and you will be able to keep several colors melted at the same time.
Another method like the warming tray, is a triple slow cooker buffet/warmer set. I have one of these and it works great when set on warm setting

Dipping
Grab a few cake pops out of refrigerator or freezer. If they are in the freezer now is the time to transfer them to the refrigerator so they stay firm but do not freeze.
Dipping with a stick
Dip ½ the tip of the candy sticks in candy melts and stick about half-way through your cake ball. If you cake balls have started to soften due to sitting out for too long, place back into the refrigerator until firm.
Holding the candy stick with the cake ball attached, dip the entire cake ball into the candy melt until completely covered and meets the base of the candy stick to secure the cake ball to the stick when the Candy Melts sets. You want to make sure the cake pop is submerged enough to completely cover it and remove it from the Candy Melts without having to submerge it more than once.
The best tip is to have a small, deep bowl this helps, as the Candy Melts can weigh the cake pop down as you are dipping it and pulling it out of the Candy Melts which can cause the cake pop to pull away from the stick.
After taking the cake pop out you will notice some excess Candy Melts dripping off. For a smooth finish you will want to hold the stick in one hand and tap your wrist with your other hand, or tap the cake pop stick ever so slightly, to shake off the excess. To make sure the finish coating dries evenly and is not heavy on one side, rotate the cake pop as you are tapping it so that way the remaining excess Candy Melts drips off. If any excess at the bottom of the stick and cake pop you can wipe off with your fingers.
Place the Cake Pop Stand or styrofoam blocks for drying. If you are in a humid climate or if it just happens to be a hot summer day. It is best to place the cake pops in an area that is cool to allow to set.
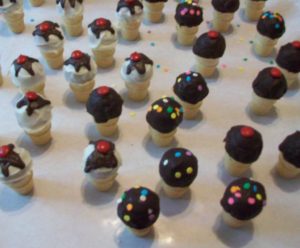
No Stick Dipping.
Some cake pops are not made on sticks but rather can be made in mini cupcake papers or just by themselves. The dipping method for these is a little simpler than dipping cake pops with a stick.
Place the cake ball/shape on a fork and completely submerge into the candy melt.
Slowly pull out the cake ball/shape and let candy melt drip off the fork. Tap lightly making sure all excess candy melt is removed.
With a knife slowly push off the cake ball/shape onto a foil lined cookie sheet to allow candy melt to set.

Finishing Touches
- Pick out your toppings:
- Sprinkles
- Confetti (I enjoy using Wilton’s 6 mix confetti/sprinkles. You can usually find the best combos of confetti and sprinkles just in one jar rather than buying several different jars)
- Food Pens
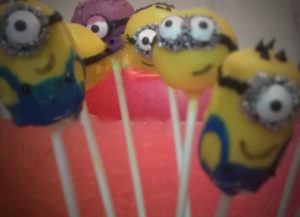
- Candy for ears, noses, feet etc.
- Piping bags for drizzling (optional)
- Edible Glitter
If you are using confetti, sprinkles or edible glitter you will want to make sure to apply these before your cake pops set completely.
The best test is to ever so slightly touch one of the cake pops and to see if it is “tacky” at this point you will want to apply your confetti, sprinkles or edible glitter. At this time it is best to also place any candy that you are using for ears, feet, hands or noses in some cases, etc.
Some accessories can be added with just some candy melts and stuck in place on the cake pop. This all depends on what your design is.
If you are just wanting to put some candy melt drizzle on your cake pop for an easy finishing touch, you can do this with a spoon, knife, or use a piping bake.
Displaying
Depending on what you made your cake pops for will determine how you want to display them. You can use cake pop stands, or display your cake pops as centerpieces.
Some ideas for displaying other than your cake pop stands, are mason jars, (I have found that the 8oz jars work best), or decorative boxes/containers to create bouget like centerpieces. The best boxes I have found for these are the mini popcorn boxes, or favor bags/boxes for birthday parties. However you can always get creative if you put your mind to it.
Other things to think about as well is who you are serving. If you are just taking your cake pops to a gathering with friends and family you should just be able to have them displayed and ready to eat.
However if you are catering for a party or event you will want to make sure you individually wrap each cake pop with lollipop bags and ties or ribbons.
If you are choosing to do a centerpiece here are some helpful hints.
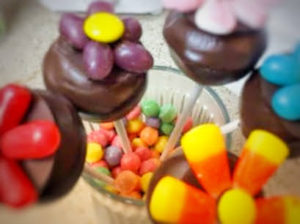
Candy Filling
Any kind of small candy to fill the mason jars work really well. The one candy I enjoy using the most is SweeTarts Mini Chewy. When poured at the bottom it creates a nice dense base that the cake pops don’t move and stay still.
Of course depending on your theme you can always use M&M’s, Jelly Beans etc. again you just want to make sure your candy makes a sturdy base to hold the cake pops without a lot of movement.
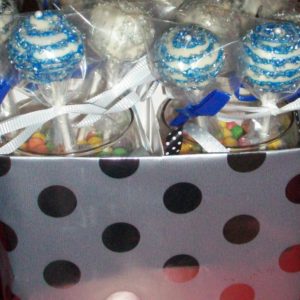
Styrofoam and Paper Confetti Filling
For the candy/favor boxes you will want to make sure to find small styrofoam blocks that will fit your boxes and then cover with Raffia paper confetti before arranging the cake pops. This will ensure that your cake pops will not move or fall over.
This post contains affiliate links. As an Amazon Associate we earn from qualifying purchases at no additional cost to you. Find our full disclosure here.
We can’t thank you enough for your support in making our dreams come true and allowing us to share our adventures, recipes, and stories with you all!
Our Venmo Donate is not only a great way to support us for some server time so we can continue to provide you with content; but a way you can come with us for tours, happy hour drinks and on ghost adventures.
About The Author
Spirits Food and Booze
Spirits Food and Booze was created with love, and ideas from each one of us. We love to share our ideas, crafts, recipes, fun times, and experiences. We are amateur ghost hunters, foodies, crafters, and all around enjoy having a good time. We hope you enjoy our site and come back for more!
